Brokers: tour books, verified listings, and team filters are live
Three problems kept coming up in broker conversations: tour prep takes too long, listing availability is a guessing game until you chase it down manually, and the home page gets noisy the moment you are on a team. This release tackles all three.
If you got the email, this is the full walkthrough with screenshots. If you did not, here is everything that shipped.
Printable tour books
The problem
Every client tour meant exporting property data, dropping it into Canva or a Word doc, formatting a route, and hoping the layout held together when you printed it. If something changed last minute (a property got pulled, a time shifted), you were back in the design tool.
How it works now
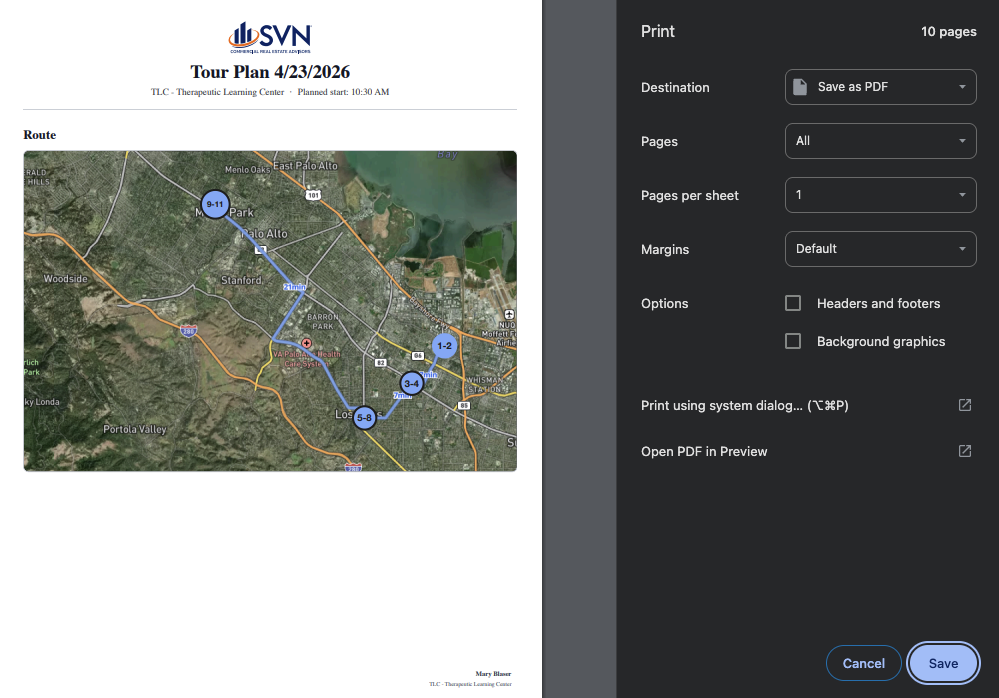
Any saved tour has a tour book view. Open it, and you get a structured layout ready to print or save as PDF directly from the browser. No separate tool, no reformatting.
The tour book includes:
- A satellite route map showing every stop in order, so both you and the client can see the day's drive at a glance
- An itinerary block with stop times, travel distances between stops, and parking details you entered during tour planning
- A detail card for every stop with the property stats, your selected data points, and lined space for handwritten notes during the walkthrough
- A branded footer on every page with your name and the survey title, so the PDF looks professional if it gets forwarded
If you do not want a section in the printed version, you can remove it before printing. Do not need the map for this client? Hide it. Want to drop a stop that fell through? Remove the card. The PDF reflects exactly what you leave on the page.
When to use it
Open the tour book before any client tour. Print a copy for the car, email the PDF ahead of time, or hand it to a partner who is covering the tour for you. It pulls everything from the tour you already built, so there is no duplicate data entry.
Listing verification
The problem
Before a tour, you need to confirm that every property on the list is still available and that the details are accurate. That used to mean writing individual emails to each listing broker, waiting for replies, and manually tracking who responded. For a 10-property tour, that is 10 separate email threads to manage before you even get in the car.
How it works now
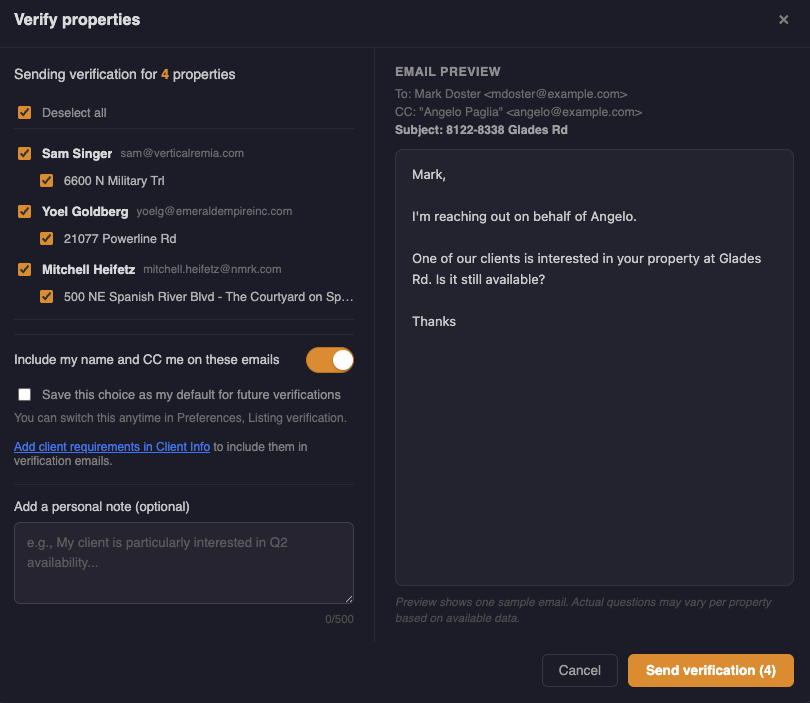
From the survey admin page, you can verify properties in bulk. Select the properties that need confirmation, and the platform generates an outgoing email to each listing broker. You see a full preview of every email before anything sends, so you control the message.
Once sent, verification status updates on each property so you can see at a glance which ones are confirmed and which are still pending. No spreadsheet tracking, no digging through your inbox to figure out who replied.
When to use it
Run verification a few days before any client tour. You will know which properties are confirmed and which need follow-up before tour day, instead of finding out in the parking lot that a space was leased last week.
Team filters on the home page
The problem
If you are on a team, the home page shows every survey, property, and folder across all team members. That is useful sometimes, but most of the time you just want to see your own work. There was no way to scope the view without mentally filtering past everything else.
How it works now
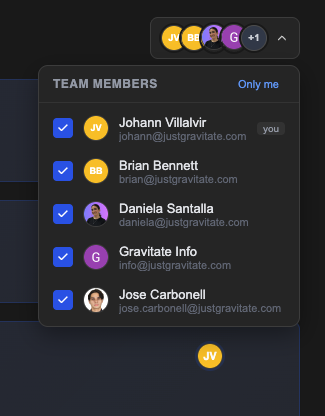
The home page now has a team filter at the top. Click it and you get a dropdown of your team members with avatars.
- "Only me" shows just your surveys, properties, and folders
- "All" brings back the full team view
- Or multi-select specific teammates if you are working a deal together and want to see just your combined activity
Surveys, properties, and folders all follow the same filter. Folders that have no matching surveys in the current filter are hidden automatically so you are not looking at empty folders.
Your filter selection is saved between sessions. If you set it to "Only me" on Monday, it is still set to "Only me" when you open the platform on Tuesday.
When to use it
Set it once and forget about it. If you mostly work solo, "Only me" cleans up the home page immediately. If you manage a team, select the people you are supervising. Switch to "All" when you need the full picture.
Also in this release
Saved data point layouts
When you customize which data points show on a survey (and in what order), you can now save that configuration as your default. Next time you create a survey or adjust fields, your saved layout is one click away instead of rebuilding it from scratch.
Leased/Sold status badges
Properties marked as leased or sold now show a clear Leased/Sold badge on the client-facing survey page. Clients see exactly what is still on the market without having to ask.
Multi-suite building grouping
If a building has multiple suites on a tour or survey, they now group under the same address with suite labels instead of showing as separate property entries. Cleaner for you and cleaner for the client.
What is next
These features came directly from broker feedback. If you have not tried them yet, they are live now in your account. If something does not work the way you expected or you have ideas for what should ship next, reach out. That is how this list got built in the first place.